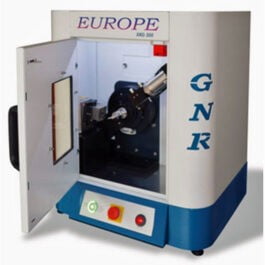
StressX – X-Ray Diffractometer for Residual Stress Measurement
Robotic Residual Stress measurement StressX
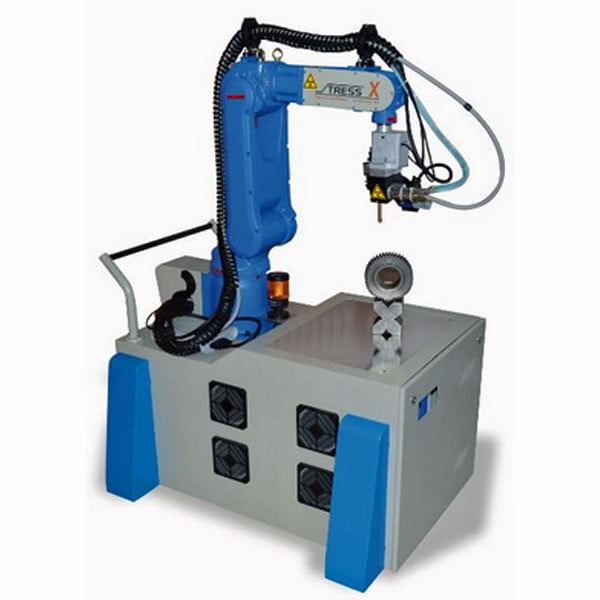
Robotic Residual Stress Measurement by X-Ray Diffractometer mounted on 6-axis robot
- Test Methods: EN UNI 15305, ASTM 915
- StressX provides a flexible solution to residual stress determination on samples of any dimensions by the original synergy between compact X-ray diffractometer and 6-axis robot.
- 6-axis robots are available with positioning accuracy and repeatability as low as 20μm and positioning range as high as 895mm radius from robot centre.
- Measuring target is defined by a combination of a Video camera for X-Y pointing and a laser for Z positioning.
- Laser accuracy is less than 10μm and measuring range can be as high as 300mm from the goniometer center.
Non-destructive residual stress measurement on any dimension’s samples
* EN UNI 15305 and ASTM 915 compliant
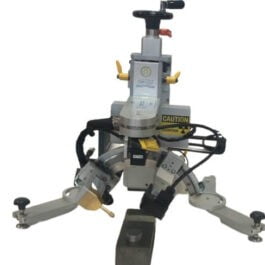
* X Ray Diffractometer mounted on 6-axis robot ( Portable model also available)
StressX is a dedicated X-Ray Diffractometer for non-destructive analysis of Residual Stress. The head of the diffractometer is mounted on an anthropomorphic 6 axis robot that allows to analyze samples of any dimensions and shapes.
StressX could be mounted either in a closed cabin suitable for laboratory analysis or on a four-wheel trolley for on-site analysis.
Residual Stress could be induced by machining, grinding, rolling, deep drawing, welding, thermal hardening and shot peening. Quantification of residual stress allows to prevent fatigue damage and to control material’s durability and safety.
StressX provides a flexible solution to residual stress measurement on samples of any dimensions by the original synergy between compact X ray diffractometer and 6-axis robot.
6-axis robots are available with positioning accuracy and repeatability as low as 20μm and positioning range as high as 895mm radius from robot center.
Measuring target is defined by a combination of a Video camera for X-Y pointing and a laser for Z positioning.
Laser accuracy is less than 10μm and measuring range can be as high as 300mm from the goniometer center.
GNR StressX system is equipped with the following main components:
- Main Unit
- 6-axis anthropomorphic robot
- Psi Goniometer
- Linear position sensitive detector
- Laser
- Software
| X Ray Generator | |
| Maximum Output Power | 300 W |
| Output Stability | < 0.01 % (for 10% power supply fluctuation) |
| Max Output Voltage | 30 kV |
| Max Output Current | 10 mA |
| Voltage Step Width | 0.1 kV |
| Current Step Width | 0.1 mA |
| Ripple | 0.03% rms < 1kHz, 0.75% rms > 1kHz |
| Preheat and Ramp | Automatic preheat and ramp control circuit |
| Input Voltage | 230 Vac +/-10%, 50 or 60 Hz, single phase |
| X-Ray Tube | |
| Type | Ceramic Cr Anode (options: other anode upon request) |
| Collimation | Monocapillary collimator: diameter 0.5-1-2 mm |
| Max Output | 210 kW |
| Goniometer | |
| Configurations | Vertical geometry |
| Angular Range | 10 or 22° |
| Angular accuracy | +/- 0.001° |
| Detector Type | Microstrip solid-state |
| Cabnet | |
| Dimensions | Width 658 mm, height 1059 mm, depth 762 mm |
| Leakage X-rays | < 1 mSv/Year (full safety shielding according to the international guidelines) |
| Processing Unit | |
| Computer Type | Personal Computer, the latest version |
| Items controlled | X-ray generator, detector, counting chain |
| Basic Data Processing | Uni-axial, bi-axial and tri-axial stress state analysis. |
Acquisition and Stress Analysis
A specific Software allows to measure and calculate residual stress on any polycrystalline material.
- Acquisition time/step : 30-120 s
- Step : 5-13
- Peak position determination by profile fitting taking into account theoretical constrains
- Uni-axial, bi-axial and tri-axial stress State analysis
- Normal and shear component analysis available for uni-axial measurements
Some specific applications of the Stress-X are listed below:
- Detection of Residual Stress on sprocket wheels
- Detection of Residual Stress on car motor parts (cam axles, connecting rods, engine shafts, equalizers etc.)
- Detection of Residual Stress induced by deep drawing (household appliances, structural parts etc.)
- Detection of existing Operational Stress on gas conducts
- Detection of Operational Stress on large tensioned structures
- Measurement of efficiency of Shot-Peening and rolling of components subjected to Stress
- Definition of the quantity of Retained Austenite on bearings and parts of diesel motor injectors
- Detection of Residual Stress in castings (cast iron parts of tool machines and aluminum components)
- Detection of Stress induced by welding (laser and electron)
- Search for a correlation between residual stress and stress resistance of aluminium alloy car rims
- Optimization of working parameters for swarf removal to improve the stress resistance of mechanical components
- Detection of Residual Stress on helicoidal and leaf springs
- Search for critical zones after applying workloads (arms and aeronautics)

